Creating A WordPress Blog Slug Part 2 – Python

In a previous post, I posted a sample NodeJS function to assemble a WordPress blog slug. I ended up rewriting part of the larger application (and the function itself) in Python.

In the below function, source is a blog title string, and it returns a slug suitable for use in a blog URL.

def generate_slug(source):
    i = 0
    source = source.lower().strip()
    allowed = "abcdefghijklmnopqrstuvwxyz1234567890"
    slug = ""
    while i < (len(source) - 0):
        single_letter = source[i:i+1]
        if single_letter in allowed:
            slug += single_letter
        elif not slug.endswith("-"):
            #letter is not allowed
            #check that the slug doesn't already end in a dash
            slug += "-"
        i = i + 1
    return slug

Listing Files Within A Bucket Folder – Python

Here’s a short code example in Python to iterate through a folder’s ( thisisafolder ) contents within Google Cloud Storage (GCS). Each filename can be accessed through blobi.name – in the below code sample, we print it out and test whether it ends with .json.

Remember that folders don’t actually exist on GCS, but a folder-like structure can be created by prefixing filenames with the folder name and the forward slash character ( / ).

    client = storage.Client()
    bucket = client.get_bucket("example-bucket-name")
    blob_iterator = bucket.list_blobs(prefix="thisisafolder",client=client)
    #iterate through and print out blob filenames
    for blobi in blob_iterator:
        print(blobi.name)
        if blobi.name.endswith(".json"):
            #do something with blob that ends with ".json"

Python SQLite Table Creation Template

I often use the Python sqlite3 module: it helps save time during development as it’s a lightweight SQL engine. Even in production, some small applications can get away with running SQLite instead of a more normal SQL application.

To create a table in sqlite:

import sqlite3
def create_table():
    create_table_sql = """CREATE TABLE tweets (id INTEGER PRIMARY KEY AUTOINCREMENT NOT NULL UNIQUE,
     posted_date DATETIME, tweet_text VARCHAR(300),
     user VARCHAR(20), retweet_count int, favorite_count int,
     original_tweet_id VARCHAR(20)
     original_user VARCHAR(20));"""
    conn = sqlite3.connect("example.db")
    c = conn.cursor()
    c.execute(create_table_sql)
    conn.commit()
    conn.close()

And to execute operations against the created table, you simply need to connect to example.db and run c.execute:

# Execute into sqlite
conn = sqlite3.connect("example.db")
c = conn.cursor()

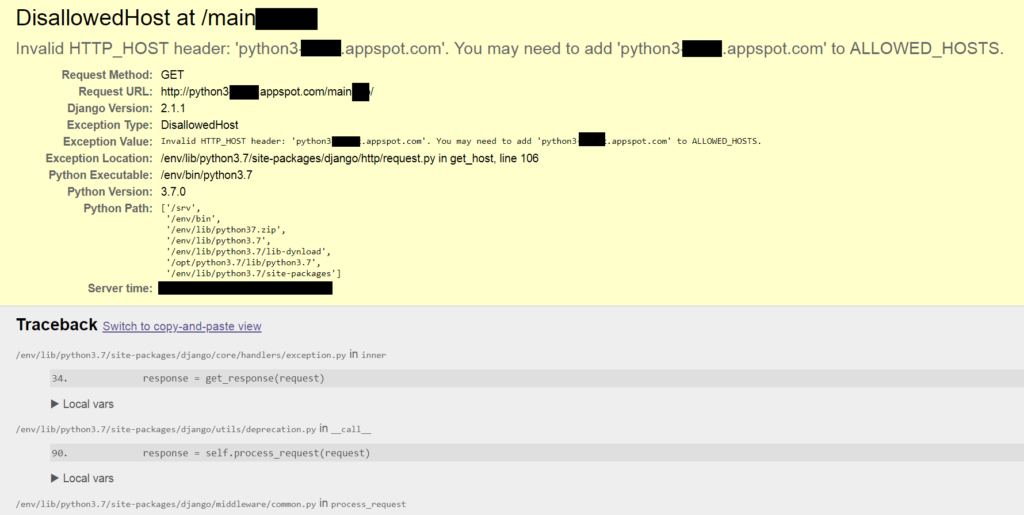
DisallowedHost – Invalid HTTP_HOST Header “example.appspot.com”

When installing a new Django app on App Engine, I forgot to set the hosts header, and found this error:


The problem here is that I didn’t set the allowed hosts header in the settings file. To fix this, go to settings.py file and set ALLOWED_HOSTS to list a wildcard, like so:

ALLOWED_HOSTS = ['*']

You can see this replicated in Google’s own Django example: https://github.com/GoogleCloudPlatform/python-docs-samples/blob/master/appengine/standard/django/mysite/settings.py#L46 (see screenshot below).

A screenshot of allowed_hosts including a wildcard.

Warning: A wildcard is only acceptable because App Engine’s other security policies are protecting the application. If you move the Django site to another host, make sure you change out the wildcard to the appropriate domain/domains.

Amazon Cloud9 IDE Python 3

I spent today morning pulling my hair out trying to get a Python 3 application running within AWS’ Cloud9 IDE. Essentially the problem is that if you pip install some-package, that package only becomes available within the Python 2 runner, not within the Python 3 runner (the current Cloud9 machine image includes Python 2 aliased as python, and Python 3 available through python3).

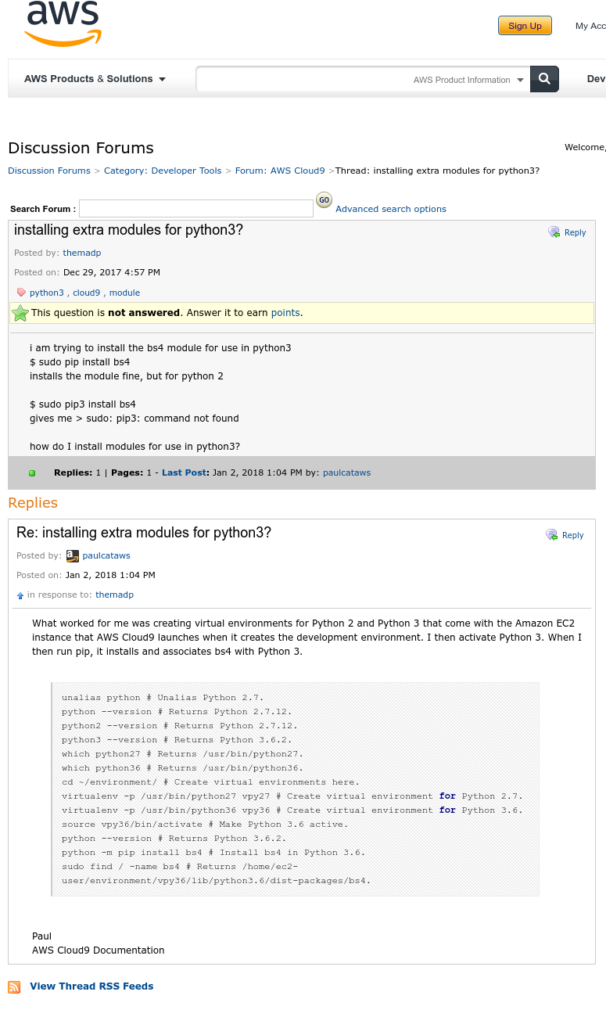
Fortunately for me, someone else had the same problem, and an Amazon staffer suggests creating a virtual environment: https://forums.aws.amazon.com/thread.jspa?messageID=822214&tstart=0 . I followed the steps mentioned, but it didn’t work – pip still installed dependencies for Python 2. I wonder if this staffer forgot to mention another step, such as remapping the pip command to a Python 3 install.

What finally did work was calling the pip command through the python3 interpreter, like so:

First, ensure pip is installed:

python3 -m ensurepip --default-pip    

Then upgrade pip:

python3 -m pip install --upgrade pip setuptools wheel

Then you can install any requirements of your app, such as BeautifulSoup:

sudo python3 -m pip install --upgrade bs4

And after all that, my Python 3 app was able to access the BeautifulSoup dependency.